
The Dreaded LHKRPTSD (Left-Handed Knitting-Related Post Traumatic Stress Disorder)
When I was 12, in grade 7, I had to take a class called Crafts, that nearly turned me off string forever. Sadly, the teacher didn’t “believe in” left-handed (aka backwards) knitting.
Now, as a craft teacher myself, I look back on that class and wonder if it would be even be possible to do a worse job of teaching a bunch of kids the joys of needlework. It took me 37 years to even try to learn to knit again. Thank Habetrot, she didn’t try to teach me crochet! Teaching an opposite-handed beginner to do yarn-craft takes a little extra work but it can be done very successfully.
Worst. Craft Teacher. Ever.
So back to 1978. 12 year old me would be knitting along on my 12 inch teddy bear, using horrible, scratchy, blue, variegated acrylic, when she would sneak up behind me. Quick as a snake, she’d smack the back of my hand with a knitting needle, rip several rows of the knitting out, turn the whole mess around, and tell me to “knit properly, not backwards”.
Now, I probably could have learned to knit right-handed, but my sense of justice would not allow it. Everyone else finished their bears in a reasonable amount of time, but we continued to struggle over mine for the whole term. Neither of us would give in.
In the end she did let me finish when the term was ending. At the end of the last class, I walked out last, made sure she was looking, and ostentatiously dropped that damned bear in her garbage can on my way out.
Teacher! Leave those lefties alone!
These days, it’s unusual to run into this attitude so openly, but it was once common. My mother was a lefty who was forced to switch to her right hand in school. (Then she developed polio in her right arm, had to switch back to her left hand, before recovering and being forced to switch back to her right hand again! It left her with the most illegible handwriting I have ever seen.) But many right-handed handwork instructors are still somewhat at a loss when faced with a left-handed student.

My Time Tested Teaching Technique
So here is my technique. It really works well, I promise you.
First of all, I should mention that if you are a left handed student who can find a left handed teacher, do that. If for no other reason then for the bond that two lefties seem to always feel in a right-handed world. That is one reason that I specialize in teaching left-handed students. But if you are a teacher in an opposite-handed situation, like I usually am, then…
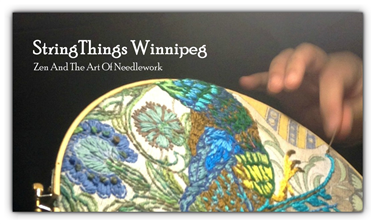
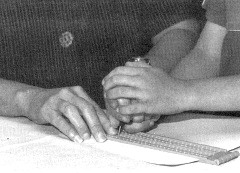
Sit across from your opposite-handed student, knee to knee ideally. This is going to require some hand-over-hand guidance. Always remember to ask permission before touching a students hands! (See picture at the top. I am teaching a student tapestry weaving face to face.)
Demonstrate the motions with your correct hand, but reversed. Let me explain, using crochet as an example.
I always start with the slip knot and chaining. The basic moves are wrapping your non-dominant hand, while holding the working yarn below the stitch with the thumb and second finger and taking the hook into your dominant hand. Then yarning over and pulling through the first loop (the slip stitch) . Then repeating over and over and over until it’s super easy. Yarn over, pull through, yarn over pull through.
The difficult part to demonstrate is the yarning over. Normally one goes under the working thread in a scooping motion, turns the hook down towards oneself, pulls through the loop, and rotates the hook back into the upright position by turning it away from yourself.
For an opposite-handed student reverse this so that it looks correct from their point of view. Go over the yarn, scoop the yarn, rotate the hook down away from yourself, pull through the loop on the hook and rotate the hook back upright, by turning it towards yourself.
Practice this a bit alone first, it’s awkward but doable. I prefer to use this technique rather then struggle to crochet right-handed because once they have the hook in their hands I find the hand-over-hand guidance is best done with my most skilled motions.
This technique lets me teach an opposite-handed student face to face, showing them how the movement work correctly from their point of view, and lets me observe and guide their motions closely. I have found that hand-over-hand (or sometimes hand-under-hand) teaching is far more effective then just demonstrating and the student copying is.
Teaching handwork is teaching the hands.
For one thing, most of the learning and teaching happens with the hook in the new crafter’s hands. Teaching handwork is just that, teaching the hands. Handwork is not really a verbal skill, you need to feel it when it’s right. At some point the motion will just feel correct, it’s almost like it clicks into focus. I do not know what is happening in the brain but I do know it is not happening in a verbal part of the brain. The feeling is impossible to describe but when you are helping to manipulate someone’s hands into the right movements, both the student and teacher can feel that click. It really is magical.
Craft is best taught, not from in front of a class but intimately, one on one. Hands teaching hands, and eyes meeting eyes; with talk, laughter, tea, breaks, and lots of praise for each small success to sooth the frustrations that are inevitably part of learning a new hand skill.
If it works with toddlers it’ll work with anyone
I suppose this style of teaching comes naturally to me. I have spent over 20 years working with preschoolers; mostly infants, toddlers, and kids who have special needs and developmental delays. In fact, it was very rare for me to work with anyone who could speak! So now I still teach the same way, with lots of friendly talk (I always modelled speech and with non-verbal kids I learned not to need much response!), a very warm style, with gentle touch, lots of patience, a slow comfortable pace, and friendly respectful hands touching hands.
Respect The Hands.
I do have one very important caution. Someone letting you touch their hands is a profound act of courage and trust, so treat it like the precious gift it is.
No one is obliged to let anyone touch them, and if your student seems uncomfortable at all take your hands away. You can teach with demonstration and verbal instructions only, and you should if your student would be more comfortable that way. In any event, use touch only the minimum that is needed. The goal is for the new crafter to become comfortable with the motions in their own hands.
I cannot repeat this enough; Be Respectful!
I facilitate and teach in a drop-in art/craft program on a centre for adults with mental health issues which is lucky for me. It has given me many many opportunities to learn exactly how to help nervous beginners become comfortable, successful, and mindful with their chosen string craft.
I am very privileged to be able to share something that is so powerful and healing, not just for the students, but for me too. I hope string things may bring each of you the same blessings!
With all of my love,
Baba Stringthings (aka Renata from Winnipeg)
PS. Please let me know if you liked this post. Or not! I hope to hear from you and hear your thoughts and experiences with opposite-hand teaching and learning. I’d love to hear from fellow lefties too!
PPS. Here, as promised, is a link to my Pinterest Board of Weaving Goddesses. Habetrot and her Sisters can be found here. Enjoy 🙂

My tiny baby is a lefty.
All my older kids were righties just like me.
Even though she is 2, I still feel panicky about how to teach her writing, and crafting when to me, everything is completely backwards.
I really needed and loved this post!
Thank you!
LikeLiked by 1 person
Melanie,
I am so happy that this is helpful to you! I do have one hint, don’t start with knitting or crochet – start with embroidery! Use a large blunt yarn needle on a hoop of burlap or other open-weave cloth. It’s a great craft to start with, even older toddlers can enjoy and be successful with it,
It’s a good place for you to practice giving a lefty hand over hand guidance. You would start with her in your lap on a chair pulled up to a table, using your left hand over her left hand, your right hand over her right hand. The goal is basically single stitches anywhere she wants to put them! Don’t be surprised if she uses both hands, just go with the flow!
You will find many excellent crafts to do with preschoolers if you look up Montessori teaching, Maria Montessori was a wonderful hand-work teacher, and her method emphasizes it.
Good luck and enjoy you lovely little lefty. I hope to hear how she is doing and how you do crafting with an opposite-handed child. 🙂
With all of my love,
Baba StringThings
LikeLike
Thank you so much for this post – I didn’t get subjected to being taught to knit at school but I did run into the same issue with a lot of sports where the teacher threw a hissy fit until I tried play right handed. Thinking back on it, it was incredibly unprofessional and I am honestly of the opinion now if you can’t possibly entertain the idea of teaching someone with a remotely different style to you, should you really be teaching. Youtube (and the amazing Bill Souza) was a godsend for learning to knit as I’ve had some pretty rubbish experiences at knitting classes. Thank you for trying to rectify this!
LikeLike
Oh yes, YouTube is the very best thing ever. I got a good start on learning bobbin lace, sewing, darning, kumihimo, tatting, crochet, tapestry, band, and loom weaving, as well as a whole host of other wonderful skills mostly from Youtube (and books, and much much experimentation!) And before I found a weaving teacher, I actually managed to get a tiny table loom and learn to warp it from youtube! That is not an easy feat and I DO NOT recommend it. 😦
It’s so easy to be a lifelong learner now. The only challenge is to not drown in all of the wonderful possibilities 😉
And hello to a Sister Lefty! I agree with you wholeheartedly. If we can’t deal with such a minimal and common human variation difference than how are we ever going to be able to understand and cherish people with more unusual variations? It takes a little more patience, empathy, imagination and humour, but a good teacher can always help create clarity, even if it is in a small way. A bad teacher can turn a person’s interest in their area off for a lifetime. It’s a lot of responsibility and calls for our very best effort.
I hope that me sharing my string skills with the people I am fortunate enough to teach will be a good memory for my students one day.
And that no-one will ever write a post like this about me! (Finger’s crossed)
Baba StringThings
LikeLiked by 1 person
I think we share a common approach to crafting! A marudai is definitely my last ‘craft equipment’ purchase I need to make and I am going to get around to finally learning to tatt. I’ve tried teaching myself a few times and can manage a few stitches but then it all goes a bit wrong. How easy is bobbin lace to self teach? I picked up a lovely set of bobbins when I was in Brussels but haven’t had chance to use them yet.
Exactly. I will be forever grateful to my teachers who really taught me how to have fun with various crafts as well as taking a lot of stress out of the learning process!
LikeLiked by 1 person
Hi!
I would love a marudai too! The little foam disks are wonderful, and I adore how easy it is to tuck one into a pocket and have it handy whenever you get the urge to braid, but someday I want to try the more complex and interesting weave structures.
Also, I am an enormous fan of textile tools – the more arcane the better. 🙂 If you could see my apartment you’d see that they are my weakness…
Tatting was the single hardest string skill for me to learn. It was that little ‘flip’ of the knot from one thread to the other, well that and the fact that each stitch is a knot. No easy frogging or tinking in tatting! It took me almost 20 hours before the movement became automatic.
I am pretty sure that only my stubborn temperament that kept me at it until I got that stitch into my stubborn hands:-) And although I still like to tat every so often, I find myself doing thread crochet lace more and more often instead. It’s just so free and easy comparatively. Same with bobbin lace.I learned bobbin lace and tatting before I learned to crochet. I think if I had done crochet first it would have been less likely that I would have stuck with tatting and pillow lace. They are more rigid and unforgiving forms.
Pillow lace is like all good crafts though, it looks MUCH more complicated then it is. Truthfully, there are really only 2 or three motions, right bobbin over left, left bobbin over right, either one at a time or in pairs, and put the pin in the right place.
You print out the pattern and work the lace right on top of the paper so it’s easy to see where to go.
If you want to try it on the cheap and you already have bobbins just cover some Styrofoam in velvet and use that as a cookie. It’s a fun craft to play with:-)
In case you want to give it a go, I learned the basics from watching this amazing set of videos (a lot). She is so patient and thorough!
It’s wonderful to hear from you,
Baba StringThings
LikeLike